How to Choose the Right Excavator Tilt Coupler?

Choosing the right Excavator Tilt Coupler is not just a matter of matching pin dimensions. The coupler must suit the excavator’s weight class, hydraulic setup, attachment range, and daily working conditions. A mismatch can reduce digging control, slow attachment changes, or create unnecessary strain on equipment. Small details matter: measure the pin diameter, check the distance between pin centers, and confirm the machine’s approved lifting capacity.

A reliable choice begins with the machine manual and a clear list of intended tasks. Will the excavator shape drainage channels, trim slopes, or work around pipes and foundations? Each job places different demands on tilt range, locking design, and hydraulic flow. Think about the attachments already on site, too. A coupler that fits one bucket may not suit every tool in the fleet. That is easy to overlook.

A genuine quotation from a named industry expert needs a verifiable source, which was not provided here. Rather than inventing an attribution, this guide follows a practical principle: “Check the machine, the attachment, and the job as one system.” Use that as a starting point, not a substitute for manufacturer specifications or qualified technical advice. Even a well-built coupler can be the wrong choice when its limits are misunderstood. The sections ahead explain what to verify before purchase, how to compare key features, and which questions deserve a second look.

How to Choose the Right Excavator Tilt Coupler?

Understand How an Excavator Tilt Coupler Works

How to Choose the Right Excavator Tilt Coupler?
Understand How an Excavator Tilt Coupler Works

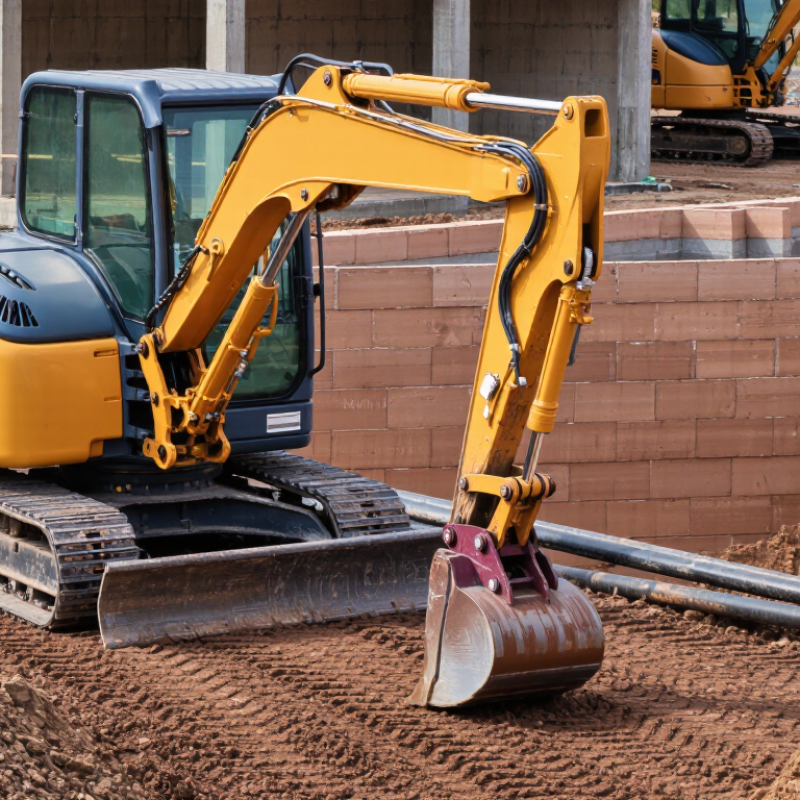
An excavator tilt coupler connects the machine’s dipper arm to an attachment, such as a bucket or grading rake. Inside, a hydraulic cylinder or paired cylinders move a pivoting section, angling the attachment left or right. The operator controls this movement from the cab, often using auxiliary hydraulic lines and a joystick switch. No magic—just controlled force through pins and linkages.

Tilt range varies by design. Some couplers move roughly 45 degrees in each direction; others offer less. That difference matters when trimming a ditch slope or working beside a foundation. The coupler also needs a compatible attachment interface and adequate hydraulic flow. Check the machine’s specifications rather than assuming a coupler will fit because its pins look close.

There is more to it. The coupler’s locks hold the attachment in place, while its pivot points carry digging forces. Dirt packed around a locking wedge can interfere with engagement, so inspect and clean the mechanism regularly. Confirm the attachment is seated and locked before digging. I used to think more tilt always meant more flexibility. Not quite: extra reach can change leverage and make precise grading harder for some operators. Brush the coupler clean, check for wear, and follow the machine and coupler manufacturers’ operating instructions.

How to Choose the Right Excavator Tilt Coupler? - Understand How an Excavator Tilt Coupler Works

Selection Dimension What to Check Typical Guidance Why It Matters
Excavator size and lift capacity Machine operating weight, coupler rating, and the load chart for the intended working position. Choose a coupler approved for the excavator and its attachment loads. Do not select by machine weight alone. The coupler adds weight and moves the attachment farther from the machine, which can reduce lifting capacity.
Tilt range Maximum tilt to each side and whether the movement suits the planned grading, ditching, or shaping work. Many tilt couplers provide up to about 45° of tilt per side; available travel varies by design and setup. More tilt can improve access to slopes and profiles, but the attachment may contact the boom or machine at extreme angles.
Pin dimensions and geometry Pin diameter, pin center-to-center distance, stick width, and the attachment’s pin or hitch arrangement. Match the coupler to the machine and attachment measurements; confirm dimensions against technical drawings or a physical measurement. Incorrect geometry can prevent installation, create excessive play, or change the attachment’s working position.
Hydraulic requirements Required oil flow and pressure, available auxiliary circuits, hose connections, and control compatibility. Compare the coupler manufacturer’s stated requirements with the excavator’s hydraulic specifications before ordering. Insufficient or incompatible hydraulic supply can impair operation or cause overheating and component damage.
Attachment compatibility The bucket and tool connection standard, attachment weight, width, and intended duty. Check every attachment that will be used, including whether it can tilt freely without interfering with hoses or the machine. A compatible coupler enables tool changes while maintaining suitable clearance and working geometry.
Locking and safety system Primary and secondary locking features, engagement indication, and the prescribed verification procedure. Select a system that meets applicable local requirements and follow the manufacturer’s engagement and inspection instructions. Correct engagement helps prevent accidental attachment release. Never rely on appearance alone; verify the lock as instructed.
Coupler weight and build clearance Coupler mass, added length, hose routing, and clearance through the full tilt and curl range. Review the assembled machine-and-attachment configuration, not just the coupler by itself. Added mass affects payload, while excessive length or poor routing can limit reach and cause interference.
Maintenance and operating conditions Greasing points, wear components, inspection access, and exposure to dirt, water, or abrasive material. Use the specified inspection and lubrication schedule; check pins, locks, hoses, and structural parts regularly. Routine maintenance supports reliable operation and helps identify wear or damage before continued use.

Note: Tilt angle and compatibility details vary by coupler design, excavator, and attachment. Confirm dimensions, hydraulic specifications, load limits, and safety requirements with the relevant equipment documentation before purchase or use.

Check Machine Compatibility and Attachment Requirements

Before selecting a tilt coupler, match its mounting dimensions to the excavator’s dipper arm and pin assembly. Check pin diameter, pin-center distance, bracket width, and available clearance with a ruler or calipers. Small gaps matter. Then verify the machine’s operating weight and the coupler’s rated capacity against the equipment manual. Hydraulic models also need compatible pressure, flow, hose connections, and control functions. A coupler that fits the pins may still exceed the machine’s hydraulic limits.

Check the actual attachment list, not just the coupler catalogue. Tilt buckets, grading beams, and compactors can differ in weight, center of gravity, and required hydraulic circuits. Confirm that the combined attachment and coupler weight stays within the excavator’s lifting chart, especially when reaching over a trench. ISO 13031:2016 sets safety requirements and test methods for earth-moving machinery quick couplers; use it as a safety reference, not as a substitute for machine-specific fit checks. The U.S. Bureau of Labor Statistics recorded 1,075 fatal work injuries in construction in 2023. That figure is not specific to couplers, but it reinforces the value of careful equipment checks. Measure twice. I still recheck hose routing after installation; it is easy to miss a pinch point when the boom is lowered.

How to Choose the Right Excavator Tilt Coupler

Start by screening for excavator size, then verify the exact machine and attachment interface before selecting a coupler.

The chart shows broad operating-weight bands for initial screening, not guaranteed coupler fit or lifting capacity. Machine classes vary by model. Check the excavator’s operating weight, pin diameter, pin-center distance, and dipper-arm width against the coupler specifications. Also confirm hydraulic requirements, attachment clearance, and the machine’s rated lifting capacity.

Match Tilt Range and Load Capacity to the Work

Choose a tilt coupler by matching its working angle to the tasks you repeat, not the widest number on a brochure. A shallow ditch beside a road may need modest correction; shaping a bank or trimming around a pipe can demand more articulation. Check the coupler’s usable tilt arc with your actual bucket attached, because bucket width and linkage geometry can reduce clearance. Test the machine on level ground. Then check a representative slope.

Capacity matters just as much. Compare the excavator’s permitted lifting capacity, coupler rating, and attachment weight; the safe working limit is constrained by the weakest part of the setup. A heavy bucket pushed sideways can create leverage that a simple payload figure does not show. Leave room for material buildup and uneven ground. Small details matter. Load charts and specifications help, but site conditions are rarely tidy. Have a qualified technician verify fitment and hydraulic compatibility before you start work.

Compare Coupler Types, Controls, and Safety Features

A tilt coupler lets an excavator angle attachments without repositioning the whole machine. A basic tilting coupler moves the tool in one plane, which suits grading and ditch work. A tiltrotator adds continuous rotation, offering more movement for shaping around pipes, curbs, and obstacles. That flexibility can be useful, but it also adds weight, hydraulic complexity, and more settings for the operator to manage. More movement is not always better.

Controls deserve a close comparison. Some couplers use the excavator’s existing joystick controls; others need extra switches or a dedicated control system. Check whether the operator can adjust tilt smoothly while keeping a clear view of the attachment. Then check visibility. A control layout that feels simple in the yard may be awkward with gloves on or when the cab is dusty. It is a detail people sometimes underestimate.

Safety features should be easy to verify, not just listed on a specification sheet. Look for a positive locking system, a clear lock indicator, and a secondary safeguard against accidental release. Before work, confirm the attachment is fully seated and locked; a quick visual check at ground level can reveal a poor connection. Procedures vary by machine and coupler, so follow the manufacturer’s instructions and train operators on the specific controls. I would not choose by price alone: service access and replacement-part availability matter, though they are easy to overlook.

Assess Installation, Maintenance, and Total Cost of Ownership

A tilt coupler should fit the excavator’s pin diameter, pin spacing, and dipper width—not just its operating weight. Confirm hydraulic pressure, flow, hose routing, and any electrical connections before ordering. Ask the installer to test the full tilt range and locking indicators under load. A coupler that fits on paper can still foul a bucket or leave hoses rubbing against the arm. Small details matter.

Maintenance access affects real ownership cost. Check how easily technicians can inspect the locking mechanism, grease points, hoses, and wear surfaces. Dust packed around a latch can hide damage; a slow hydraulic leak can leave a machine idle during a busy shift. The U.S. Department of Energy’s Operations & Maintenance Best Practices guide reports maintenance-cost savings of 8–12% for predictive maintenance compared with preventive maintenance, and 30–40% compared with reactive maintenance. These figures cover industrial maintenance programs, not tilt couplers specifically, so treat them as context, not a coupler forecast.

Compare total cost of ownership over the same service period. Include purchase price, installation, routine inspection, replacement parts, and downtime—not just the initial quote. Record inspection time and repairs on the machine; those numbers are more useful than a neat estimate. I would still challenge any calculation that assumes zero downtime. Real sites are less tidy.

Cart Summary

Subtotal: $0