How to Choose the Right Excavator Center Joint in 2026?

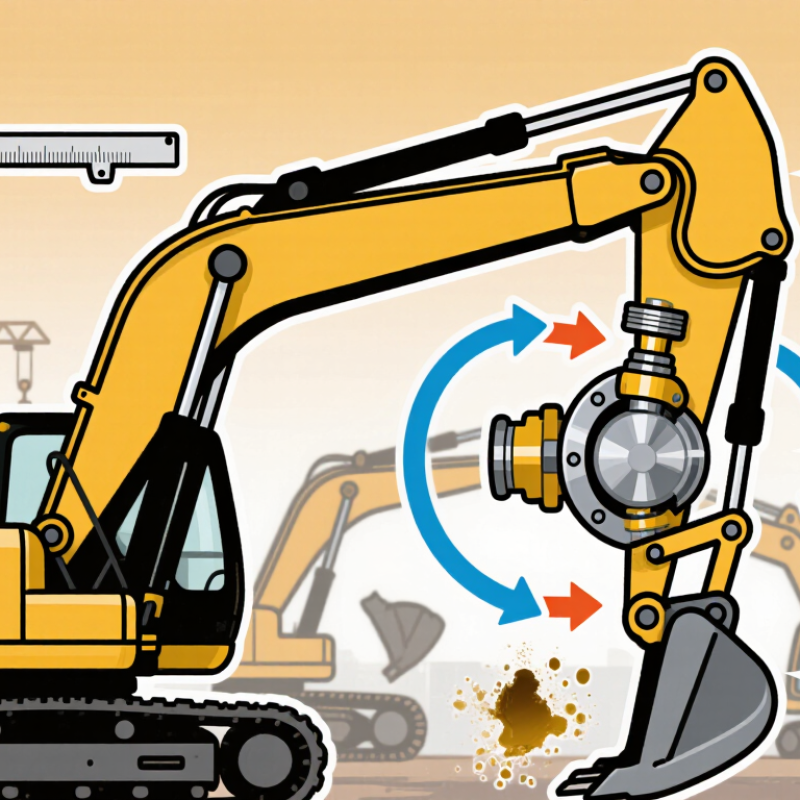
Choosing the right Center Joint in 2026 requires more than matching an excavator model number. This component transfers hydraulic oil between the upper and lower structures while supporting continuous rotation, vibration, and pressure changes. A small internal leak can leave oil stains beneath the swivel joint, reduce travel power, and create unsafe downtime on a busy site.

Market evidence supports careful selection. KHL Group’s Yellow Table continues to show strong global demand for construction equipment, increasing pressure on owners to extend machine service life. Off-Highway Research also identifies replacement demand and fleet productivity as important drivers in equipment markets. These reports do not choose a Center Joint for you. They highlight the cost of choosing poorly. Every machine has different port layouts, seal specifications, rotation requirements, and hydraulic settings.

Measure carefully. Check the excavator’s exact model, serial range, port thread, mounting pattern, shaft size, and rated pressure. Compare the supplier’s technical drawing with the original part, not only its photograph. Field technicians often find contamination, worn hoses, or incorrect installation behind repeated failures. That detail matters. A high-quality joint can still fail early when flushing is skipped or hoses are twisted during assembly. I have also seen catalog data remain incomplete, especially for older machines. That is a reason to verify, not guess. Reliable suppliers should provide material details, pressure-test records, warranty terms, and practical installation guidance. In 2026, the best choice balances compatibility, durability, service access, and total operating cost—not simply the lowest purchase price.

How to Choose the Right Excavator Center Joint in 2026?

Define the Center Joint’s Role: 360° Rotation and Multi-Circuit Flow

How to Choose the Right Excavator Center Joint in 2026?

An excavator center joint enables continuous 360° rotation between the upper structure and undercarriage. It transfers hydraulic oil, pilot pressure, and sometimes travel-brake signals through one compact assembly. Without stable flow, the machine may rotate smoothly but lose travel force. That failure appears small, yet it can stop production.

KHL Group’s 2024 Yellow Table recorded about 1.2 million construction machines sold worldwide in 2023. This scale shows why dependable hydraulic connections matter across demanding work cycles. Choose a joint by rated pressure, continuous flow, port size, rotational speed, and circuit count. ISO 4413 stresses contamination control, pressure safety, and proper hose routing in hydraulic systems.

Field technicians should also compare leakage limits at operating temperature, not only at room temperature. That detail is often missed. I have seen a joint fit perfectly on paper, then run hot because its return circuit was undersized. The catalog was not wrong. The application review was incomplete.

Tips: Map every circuit before ordering. Mark travel, pilot, drain, and auxiliary lines. Check the joint’s pressure rating against peak pressure, not average pressure. Inspect shaft play and seal condition during scheduled maintenance. A small leak can become a serious slip hazard and reduce available flow. Leave room for imperfect installation. Human error still matters.

Match Pressure and Flow Ratings: 210–350 bar and 20–300 L/min

How to Choose the Right Excavator Center Joint in 2026?

A center joint must match the excavator’s hydraulic pressure and flow requirements. Current applications commonly range from 210 to 350 bar and 20 to 300 L/min. Check both continuous and peak pressure, not only the number printed on a sales sheet. A joint rated for 250 bar may fail early in a 330-bar circuit. Flow matters too. Excessive flow can create heat, noise, and internal wear. Insufficient capacity can slow travel motors and attachments.

In field inspections, technicians should compare the machine manual, measured operating pressure, and actual hose size. Allow a sensible safety margin without choosing an oversized joint blindly. Larger components may increase cost and installation difficulty. Seal material, port configuration, rotation speed, and oil temperature also affect service life. Dirt near the mounting face can cause leakage. Small details matter. One imperfect assumption can damage a carefully selected assembly.

Tips: Record pressure and flow under real working conditions. Test cold and warm oil, because readings can change noticeably. Confirm the joint’s pressure rating exceeds the machine’s maximum working pressure. Verify its flow rating covers the highest simultaneous demand. Ask an experienced hydraulic technician to review unusual duty cycles, especially rock work or constant attachment use. Datasheets help, but measured evidence is stronger.

Count Ports and Confirm Sizes Through OEM Hydraulic Schematics

How to Choose the Right Excavator Center Joint in 2026?

A center joint is not selected by appearance alone. Count every hydraulic port on the OEM schematic. Mark travel lines, pilot lines, return lines, drain lines, and lubrication passages. A four-port joint may look similar to a six-port version, but the missing pilot circuit can stop travel control. I have seen this mistake after a quick visual inspection.

Confirm each port size from the schematic, not from the removed part. Check thread standard, nominal bore, sealing method, flange pattern, and port orientation. Metric threads and inch threads may appear close. They are not interchangeable. Record the drawing reference and revision date. OEM documents sometimes change after a production update. That detail is easy to miss.

The 2024 Yellow Table reported combined sales of 243.4 billion dollars among the world’s 50 largest construction equipment manufacturers. Off-Highway Research market reviews also identify excavators as a major equipment category, increasing pressure to reduce downtime. A correct center joint protects that investment. Compare schematic labels with hose tags and physical measurements. Then verify shaft diameter, mounting height, rotation range, and internal passage layout. Do not trust memory. Even experienced technicians can misread a return port as a case drain. Allow room for doubt, especially when the schematic is incomplete or poorly scanned.

Select Seals for Hydraulic Oil Temperatures from −20°C to 100°C

Choosing the right excavator center joint starts with the seal, not only the metal dimensions. Hydraulic oil may range from −20°C during winter starts to 100°C near a heavily loaded pump. Measure the real operating temperature, including short heat spikes. Ambient temperature alone can mislead.

At −20°C, unsuitable elastomers may stiffen and lose contact with the rotating surface. Small leaks can appear before the machine warms up. At 100°C, heat can harden the seal, reduce elasticity, and accelerate oil oxidation.

Nitrile compounds may suit moderate temperatures, while hydrogenated nitrile or fluorocarbon options can provide wider heat resistance. However, low-temperature performance differs between formulations. Check the supplier’s actual temperature chart.

Pressure, shaft speed, hydraulic-fluid type, and groove condition also affect seal life. Inspect the center joint shaft for scoring, rust, or a sharp edge. Even a correct seal will fail against damaged metal. Confirm every dimension, including section size, groove depth, and compression. Installation needs clean oil, protected seal lips, and no twisting.

A temperature rating is not enough. Field checks often reveal that contamination causes failure earlier than heat.

I once saw a new seal leak because a tiny metal shaving remained inside the groove. That was an avoidable mistake.

Still, seal selection should allow a safety margin, because machine readings are rarely perfect. Test cold starting, working heat, and post-operation leakage before returning the excavator to demanding service.

Verify Installation, Leakage, and Safety Against ISO 4413 Requirements

Choosing the right excavator center joint starts with installation, not catalog size. The joint must match hydraulic pressure, port dimensions, rotation range, and fluid type. In field inspections, I check mounting faces before connecting hoses. Even a small misalignment can load the seal unevenly.

ISO 4413 emphasizes controlled pressure, clean assembly, secure connections, and protection from stored energy. Clean every hose end. Cap open ports immediately. Tighten fittings to the specified torque, then confirm that hoses cannot twist during rotation. Never search for leaks with bare hands. Use cardboard or a suitable detection method, because pinhole leaks can penetrate skin.

Pressure testing should follow the machine procedure and approved risk controls. Watch the center joint while the upper structure rotates slowly. Look for oil mist, wet seal edges, abnormal noise, or uneven movement. Stop the test if pressure falls unexpectedly. A dry exterior is not proof of long-term reliability. Thermal expansion, vibration, and contamination may reveal weaknesses later.

A checklist helps.

However, checklists can miss poor hose routing. Record pressure readings, torque values, and photographs after installation. Recheck the joint after initial operation, because seals may settle. ISO 4413 provides safety principles, but it does not replace the excavator manufacturer’s service data or a competent technician’s judgment.

How to Choose the Right Excavator Center Joint in 2026? — Verify Installation, Leakage, and Safety Against ISO 4413 Requirements
No. Verification Dimension Required Data or Measurement Acceptance Criteria ISO 4413 Safety Relevance Status
1 Machine and center-joint compatibility Record excavator model, hydraulic circuit type, port count, port size, mounting pattern, shaft diameter, body diameter, and total height. All dimensions and port functions match the equipment service manual and the approved replacement drawing. Prevents incorrect installation, unexpected movement, and pressure-line connection errors. Verify
2 Rated working pressure Compare the center joint continuous working pressure with the machine circuit maximum working pressure, including applicable surge conditions. Center-joint continuous and peak pressure ratings are not lower than the maximum pressure specified for the relevant circuit. Hydraulic components must be selected and used within their safe pressure limits. Critical
3 Port identification Label every port before removal. Confirm travel, attachment, pilot, drain, and return connections against the hydraulic schematic. 100% of ports are positively identified; no hose is connected by position alone or by visual assumption. Correct identification reduces the risk of uncontrolled actuator movement and incorrect pressure routing. Verify
4 Seal and O-ring specification Record seal material, seal size, fluid compatibility, temperature range, and installation lubricant. Seal material is compatible with the specified hydraulic fluid and operating temperature. Seals are free from cuts, flattening, twisting, and contamination. Suitable sealing prevents fluid release and loss of pressure during service. Critical
5 Mounting alignment Check flange seating, bolt-hole alignment, shaft engagement, axial position, and rotation clearance before tightening. Mounting faces are fully seated; no forced alignment, side loading, or interference occurs throughout the specified rotation range. Correct installation limits mechanical stress, premature seal wear, and unexpected leakage. Verify
6 Fastener installation Record bolt grade, thread condition, tightening sequence, and final torque using a calibrated torque tool. Torque follows the machine or component service specification. Threads are clean, and fasteners are not damaged or cross-threaded. Secure fastening prevents component movement, hose damage, and sudden loss of hydraulic control. Verify
7 Hydraulic cleanliness Inspect open ports, hoses, seal grooves, and mating surfaces. Record flushing or filtration work completed before commissioning. No visible metal chips, lint, dirt, water, or damaged sealing material is present. Open ports remain capped until connection. Contamination can cause valve malfunction, seal damage, blockage, and unsafe actuator behavior. Critical
8 Hose routing and bend radius Measure hose clearance from the center joint, frame, counterweight, and moving structures at full rotation and operating travel. No hose is twisted, stretched, crushed, rubbed, or bent below the hose manufacturer’s minimum bend radius. Prevents hose rupture, injection hazards, and unexpected hydraulic movement. Critical
9 Pre-start pressure release Confirm engine shutdown, hydraulic controls operated to release stored energy, and pressure gauge reading before disconnecting or tightening lines. Hydraulic pressure is confirmed at zero before line disconnection. Any accumulator or trapped pressure source is isolated and discharged according to the service procedure. Stored hydraulic energy can cause serious injury even when the pump is stopped. Critical
10 Pressure test after installation Use a calibrated gauge and the pressure-test procedure specified for the excavator and center-joint assembly. Test pressure and duration follow the applicable service specification. Never exceed the lowest-rated component, hose, fitting, or test instrument. Verification must be performed under controlled conditions with suitable protection from stored energy. Verify
11 External leakage inspection Inspect the upper seal, lower seal, port connections, mounting face, and drain area after pressure testing and slow rotation. No visible oil film, droplet formation, spray, or wet track is permitted. Any leakage requires depressurization and corrective action. Prevents slip hazards, environmental release, pressure loss, and high-pressure injection injuries. Critical
12 Internal leakage indication Compare actuator response, circuit pressure behavior, hydraulic oil temperature, and return flow with the service-manual baseline. No abnormal drift, unexplained pressure decay, overheating, or loss of actuator speed is observed. Internal leakage may reduce control reliability and increase heat generation. Verify
13 Rotation and functional test Operate the upper structure slowly through the specified rotation range, then repeat with relevant hydraulic functions at low and normal operating speed. Smooth rotation with no binding, abnormal noise, hose pull, vibration, pressure spikes, or loss of function. Functional testing should confirm that safeguards and controls work as intended before normal operation. Critical
14 Guarding and residual-risk control Inspect access covers, pinch points, hot surfaces, rotating parts, hose protection, warning labels, and maintenance access. Guards are installed and secure. Remaining risks are identified, marked, and covered by safe-work instructions. Protective measures reduce exposure to moving parts, stored pressure, hot fluid, and spray hazards. Verify
15 Maintenance record and traceability Record inspection date, operating hours, measured pressure, leakage result, torque verification, seal kit details, and technician sign-off. All measurements and corrective actions are documented and linked to the installed component, without relying on memory or informal notes. Clear information and maintenance procedures support safe operation and future servicing. Complete
Technical note: ISO 4413 provides general safety rules and requirements for hydraulic fluid power systems; it does not establish one universal excavator center-joint size, bolt torque, leakage rate, or pressure-test value for every machine. Always apply the excavator service manual, component technical data, hose specifications, and the lowest-rated system component when setting final limits.

Cart Summary

Subtotal: $0