How to Choose Coloured Cable Sleeving for Your Needs?
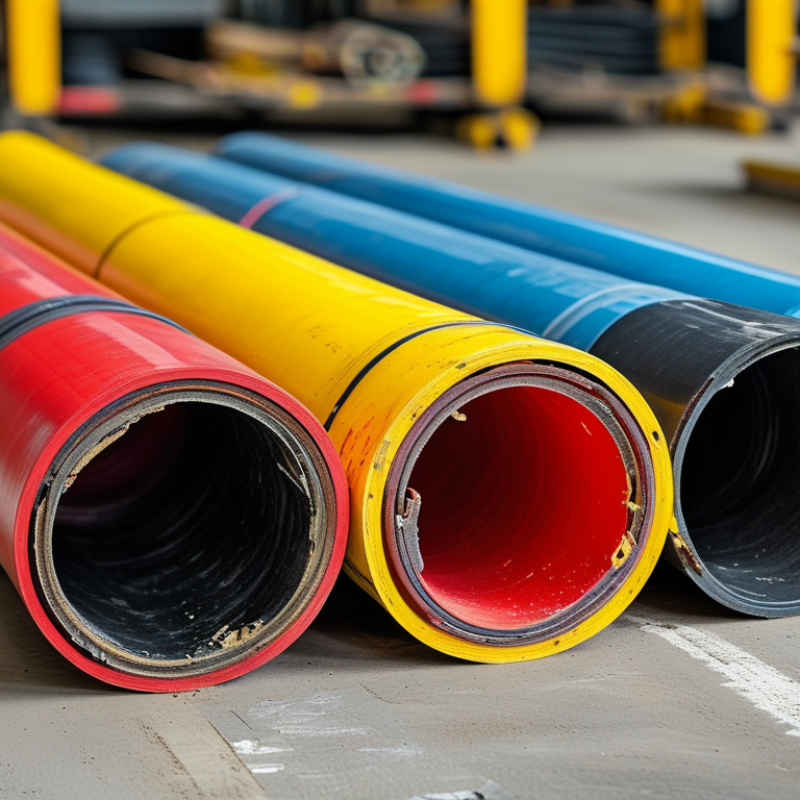
Choosing the right Coloured Cable Sleeving is more than matching a colour to your equipment. The sleeve must protect cables, support safe identification, and fit the working environment. A bright red sleeve may improve visibility inside a control cabinet, while black sleeving can look cleaner near heat-producing components. Appearance matters, but performance matters more.
In practical cable assembly work, I have seen attractive sleeving fail because it was too tight, too loose, or poorly suited to movement. Measure the cable bundle carefully. Check its expanded and recovered diameters. Consider abrasion, temperature, moisture, chemicals, and frequent bending. Braided sleeving offers flexibility and quick installation. Heat-shrink sleeving creates a tighter finish when the cable and heat rating are suitable. Neither option is automatically better.
Small details often decide the result.
Colour coding can simplify maintenance, especially when several cables run through a crowded panel. However, colour alone should not carry all identification responsibility. Labels, circuit markings, and clear installation records provide stronger reliability. Product datasheets should confirm material, temperature range, flammability performance, and compatibility with the cable insulation. Trusted manufacturers usually provide more consistent dimensions and test information.
It is easy to focus on the colour chart and overlook installation conditions. I have made that mistake myself. A sleeve can appear perfect in a sample, then become awkward around connectors or sharp bends. This guide explains how to compare materials, sizes, colours, installation methods, and long-term performance. The goal is a practical choice that protects cables and remains dependable after installation.
Identify the Purpose and Environment of the Cable Sleeving
How to Choose Coloured Cable Sleeving for Your Needs?
Identify the purpose and environment before choosing a colour. In a control cabinet, coloured sleeving can separate power, signal, and communication cables. This improves visual tracing during maintenance. However, colour is not a safety control by itself. I would still add clear labels and wiring records. The U.S. Department of Energy reports that motor-driven systems consume about 68% of electricity in American manufacturing facilities. These areas often involve heat, vibration, oil, and repeated movement. Choose sleeving with suitable temperature, abrasion, and chemical resistance. A bright colour means little if the material cracks near a hot motor.
Outdoor and wet installations need closer inspection. IEC 60529 classifies protection against water and solid objects through IP ratings, but sleeving does not automatically create an IP-rated assembly. Check the complete cable system, including connectors and entry points. In direct sunlight, select material with tested UV resistance. In crowded machinery, flexible braided sleeving may support movement better than a rigid cover. It can also expose weaknesses. Loose weave, poor edge control, or excessive tension may allow abrasion to reach the cable. Measure the cable bundle first, then allow practical expansion without making the sleeve sloppy. Data from the 2024 global wire and cable market outlook indicates continued growth in infrastructure and industrial installations, increasing the need for traceable cable management. Still, site conditions matter more than market trends. A sample test in the actual environment is often wiser than a perfect catalogue choice.
Choose the Right Sleeving Material and Protection Level
How to Choose Coloured Cable Sleeving for Your Needs?
Colour should help identification, but material decides protection. A 2024 Grand View Research report valued the global cable management market at about USD 23.2 billion in 2023. It also forecasts an 8.4% annual growth rate through 2030. This growth reflects more crowded electrical assemblies, not simply better-looking cables.
Choose PET braided sleeving for flexible abrasion resistance around desks, panels, and moving machinery. It is lightweight, expandable, and easy to install. For higher temperatures, use fiberglass sleeving with a silicone coating. Check its continuous temperature rating carefully. Some products tolerate around 200–260°C, while ordinary PVC options may remain near 105°C. Flame performance matters too. Review test evidence against standards such as IEC 60695 or UL 1441. A sleeve’s label is not enough. The full cable assembly may still fail under heat, oil, moisture, or vibration.
Tips: Measure the cable bundle first. Leave room for connectors and bends. Select a slightly larger diameter, but avoid excessive looseness. Use contrasting colours for power, signal, and maintenance circuits. In field work, I have seen colour coding reduce inspection time, yet colours fade near sunlight and chemicals. That detail is easy to miss. Also, an IP rating usually describes the enclosure or assembly, not the sleeving alone. Recheck the datasheet before installation.
Select the Appropriate Diameter, Length, and Flexibility
How to Choose Coloured Cable Sleeving for Your Needs?
Choosing coloured cable sleeving starts with accurate measurements, not appearance. Measure the cable bundle at its widest point, including connectors or protective tape. Select a sleeving diameter slightly larger than this measurement. A tight sleeve may split during installation. An oversized sleeve can move, bunch, or look untidy. In workshop testing, a small allowance often makes routing easier. However, the ideal allowance depends on the cable shape and installation space.
Length also needs careful planning. Measure the complete route, including bends and entry points. Add a modest amount for trimming and movement. Do not assume the cable path is perfectly straight. It rarely is. Flexible sleeving is useful around hinges, sharp bends, and frequently moved equipment. More rigid options may suit straight runs where abrasion resistance matters. Check the material’s temperature range and resistance data before installation. This step is easy to overlook.
Tips: Use a flexible measuring tape around irregular bundles. Test a short sample before covering the full cable. Slide the sleeving over a spare section first. If installation feels forced, reconsider the diameter or flexibility. I have sometimes chosen a larger size for faster fitting, then noticed unwanted movement later. That mistake is worth remembering. Secure the ends with suitable methods, but avoid crushing the sleeve. A neat fit should remain stable without restricting cable movement.
How to Choose Coloured Cable Sleeving for Your Needs?
| Application Scenario | Measured Cable or Bundle Diameter | Recommended Sleeving Diameter | Suggested Length | Required Flexibility | Suitable Sleeving Type | Selection Rationale |
| Single thin signal, sensor, or control cable | 2–4 mm | 3–6 mm nominal diameter | Route length + 5–10% | High | Expandable braided sleeving | Allows easy installation over connectors and follows tight bends with minimal added bulk. |
| Small group of data or low-voltage wires | 4–8 mm | 6–10 mm nominal diameter | Route length + 5–10% | High | Flexible braided PET or textile sleeving | Provides organized cable routing while retaining good movement and ventilation around the bundle. |
| Medium cable harness inside equipment | 8–15 mm | 10–20 mm nominal diameter | Route length + 8–12% | Medium | Expandable braided sleeving with a wider expansion range | Offers enough internal clearance for several conductors and accommodates moderate changes in bundle size. |
| Large control or power-wire bundle | 15–25 mm | 20–30 mm nominal diameter | Route length + 10–15% | Medium | Heavy-duty braided or woven sleeving | Provides stronger abrasion protection and maintains a defined bundle shape without excessive compression. |
| Harness passing through a narrow opening | Up to 10 mm | Same as bundle diameter or one size larger | Opening length + 10% | High | Highly expandable, lightweight braided sleeving | Its flexible structure can expand during installation and contract around the bundle after routing. |
| Harness exposed to frequent rubbing or movement | 6–20 mm | Bundle diameter + 2–5 mm | Moving route length + 10–15% | High | Abrasion-resistant braided sleeving | Combines bendability with a protective outer layer for repeated contact and cable movement. |
| Fixed cable route in a cabinet or panel | 10–30 mm | Bundle diameter + 3–8 mm | Measured route length + 3–5% | Low to Medium | Dense woven or braided sleeving | A closer fit is suitable where the harness remains stationary and a neat, structured appearance is preferred. |
| Colour-coded identification for multiple harnesses | Any practical bundle size | Select according to measured bundle diameter | Cut to the full visible route length | Based on routing | Coloured braided sleeving | Different colours can separate circuits or functions, helping inspection, maintenance, and fault tracing. |
Measurement guideline: Measure the outside diameter of the complete cable bundle, including any existing insulation or protective layers. Choose sleeving that is large enough to install without forcing it, while avoiding excessive slack. For routes with bends, movement, or connectors, allow additional length and verify the sleeving’s expansion and flexibility specifications before cutting.
Check Installation Methods, Durability, and Safety Standards
Choosing coloured cable sleeving starts with the installation method, not the colour chart. Measure the cable bundle before ordering, allowing room for bends and connectors. Braided sleeving expands around plugs and works well for grouped wires. Spiral wrap suits cables that need frequent branch points. Heat-shrink sleeving creates a tighter finish, but it requires controlled heat and suitable clearance.
Keep the work area clean. Dust can weaken adhesive linings and hide damaged insulation. Use rounded cutters to prevent frayed edges, then secure open ends with compatible clips or heat treatment. Never apply excessive heat near sensitive connectors. I have found that a neat installation can still fail when the sleeving is stretched too tightly. Leave movement space.
Durability depends on temperature, abrasion, chemicals, moisture, and repeated flexing. Check the product’s operating range and wall thickness against the actual environment. For electrical insulation, request test documentation linked to relevant regional standards, such as IEC requirements or recognized flammability classifications. Some applications may require low-smoke, flame-retardant, or halogen-reduced materials. Do not rely on colour as a safety code unless your workplace defines one clearly. Inspect the sleeving after installation and during maintenance. Small cuts matter. A less attractive sleeve with verified ratings is often safer than a bright sleeve with uncertain performance.